Step-by-Step Guide to Hooking a Horse to a Cart
- jess3152

- Jul 1
- 5 min read
Updated: Oct 2

A Comprehensive Manual for Safe and Successful Harnessing
Hooking a horse to a cart is a time-honored practice with roots in agriculture, transportation, and recreation. Whether for tradition, leisure, or work, understanding the process and the safety measures involved is essential for both the handler and the horse. This guide provides a detailed, step-by-step approach to harnessing and hitching a horse to a cart, ensuring a secure and positive experience for all involved.
Introduction
Before you begin, it is important to recognize that handling horses and carts requires patience, attention to detail, and a respect for animal welfare. Horses are powerful and sensitive creatures, and their comfort and safety should always be a top priority. Make sure you are familiar with your horse and its temperament, and that your cart and harness are in good working condition.
Preparation and Safety
· Choose the Right Horse: Ensure the horse is trained for harness work and accustomed to the cart you will use. A green or nervous horse can be dangerous.
· Inspect the Equipment: Examine the cart and the harness for any signs of wear, damage, or missing parts. Check all leather for cracks, and metal components for rust or sharp edges.
· Prepare a Safe Workspace: Select a level, open area with good footing and minimal distractions. Avoid busy roads or noisy environments when starting out, especially with young or inexperienced horses.
· Have a Helper: Especially for beginners, having an experienced helper can make the process smoother and safer.
Step 1: Gather and Lay Out Equipment
Lay out the necessary harness parts within easy reach. A typical harness for a cart horse includes:
· Bridle and bit
· Collar or breast collar
· Hames (if using a collar)
· Saddle or pad
· Breeching (for braking)
· Traces (lines that attach to the cart)
· Reins (lines that run from the bit to the driver)
· Crupper (to keep the harness from sliding forward)
· Cart (make sure it is clean and functional)
Place the harness in the order you will put it on, and check that everything is untangled and ready.
Step 2: Catch and Prepare the Horse
· Approach the horse calmly and halter it securely.
· Groom the horse thoroughly—remove dirt, burrs, or anything that could cause discomfort under the harness.
· Check for any injuries or soreness.
A clean, comfortable horse is more likely to cooperate and less likely to have problems with the harnessing process.
Step 3: Harness the Horse
· Start with the saddle or pad, placing it gently on the horse’s back so it sits behind the withers. Secure any straps or girths so they are snug but not too tight.
· Attach the collar or breast collar around the horse’s neck, making sure it fits comfortably. If using a collar, slide it over the horse’s head and settle it at the base of the neck. If using a breast collar, buckle it just above the point of the shoulders.
· If using a collar and hames, fit the hames around the collar and fasten them together with the straps or hame clips.
· Place the breeching around the horse’s hindquarters, positioning it so it sits just below the point of the buttocks. This allows the horse to brake and back up with the cart.
· Fasten the crupper under the tail to prevent the harness from sliding forward. Be gentle, as this area is sensitive.
· Attach the bridle and bit, making sure the bit sits comfortably in the horse’s mouth and the browband and throatlatch are secure but not tight.
· Lay the reins over the horse’s back, keeping them untangled and ready to attach.
Take your time during this step, ensuring every piece is properly adjusted and comfortable for the horse.
Step 4: Position the Cart
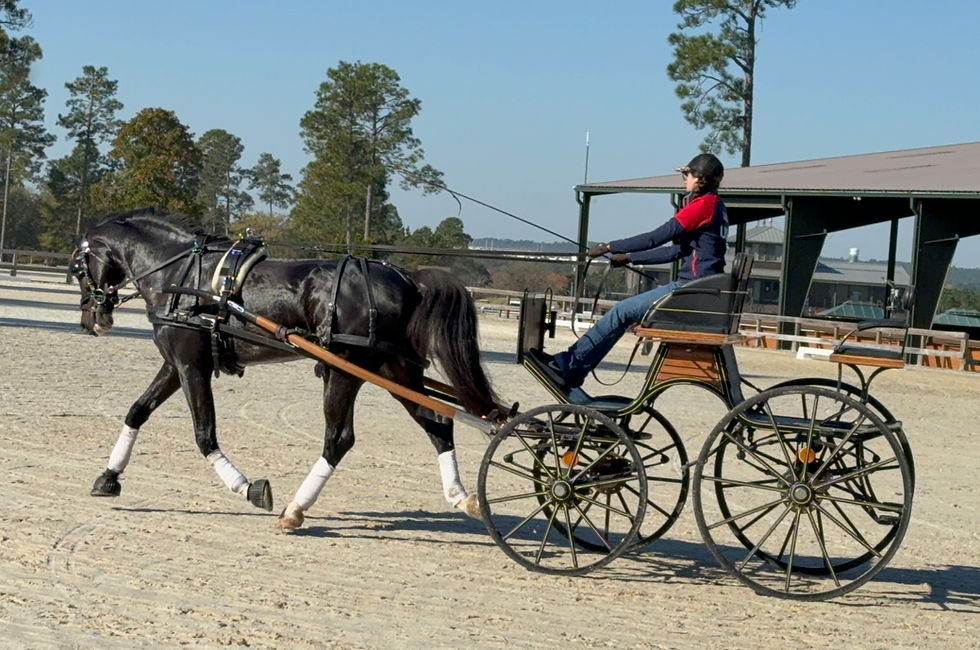
· Move the cart into position behind the horse, aligning the shafts (the two long poles) on either side of the horse.
· Either use a helper to hold the horse steady or tie the horse securely, making sure it cannot move forward or backward unexpectedly.
· Lift the shafts and gently guide them on either side of the horse, passing them through the shaft loops attached to the harness saddle.
· Ensure the shafts rest evenly and comfortably, with enough room for the horse to move freely without bumping or pinching.
Step 5: Hitch the Horse to the Cart
· Attach the traces (the straps that pull the cart) to the singletree or hooks on the cart’s shafts. Make sure they are neither too tight nor too loose; the horse should be able to stand comfortably.
· Fasten the breeching straps to the shafts or cart, allowing the horse to brake and back up the vehicle as needed.
· Double-check all connections and straps. They should be secure, but not so tight as to cause discomfort. The harness should not restrict movement or breathing.
Step 6: Final Checks and Adjustments
· Walk around the horse and cart, checking every strap, buckle, and connection.
· Make sure the bridle is correctly positioned and the bit is not pinching.
· Ensure the traces and breeching are properly attached and provide enough play for the horse to step forward or back slightly.
· Look for signs of nervousness or discomfort in the horse. Calm the horse verbally and with gentle strokes if needed.
· Make sure the driver’s seat is ready and the reins are properly threaded from the bit, through any rein guides, and into the driver’s hands.
Step 7: Getting Started
· Mount the cart carefully, keeping your movements calm and deliberate so as not to startle the horse.
· Pick up the reins and gently signal the horse to move forward. Use voice commands and gentle pressure on the reins.
· Start at a slow walk, giving the horse time to adjust to the weight and feel of the cart.
· Watch for any signs of resistance, discomfort, or equipment malfunction. If anything seems amiss, stop and check immediately.
Step 8: Unhitching the Horse
When your trip is complete, reverse the steps:
· Bring the cart to a complete stop on level ground.
· Secure the horse with a helper or by tying it safely.
· Detach the traces and breeching straps first.
· Carefully slide the shafts out of the loops and move the cart away from the horse.
· Remove the harness, starting with the bridle and working backward.
· Check the horse for sweat, rub marks, or discomfort, and offer water and praise.
Tips for Success and Safety
· Never rush the process. Horses sense urgency and may become anxious.
· Always check your equipment before and after use.
· Keep a calm demeanor; your confidence reassures the horse.
· If you are new to harness work, take lessons from an experienced driver or join a local driving club.
· Reward your horse with gentle words and treats for a job well done.
· Stay attentive on the road or trail, and always respect the horse’s limits.
Troubleshooting Common Issues
· Horse Refuses to Stand Still: Ensure the horse is properly trained and comfortable with the process. Practice ground manners and patience.
· Harness Doesn’t Fit: Invest in adjustable harnesses or have them professionally fitted to your horse.
· Cart Feels Uneven or Shafts Rub: Adjust the harness and check the cart’s balance. Padding can help prevent soreness.
· Horse Gets Startled: Always introduce the horse to new carts, environments, and noises gradually and with positive reinforcement.
Conclusion
Hooking a horse to a cart is a skill that blends tradition, patience, and responsibility. By following these steps and prioritizing the well-being of your horse, you can enjoy the pleasures of driving safely and confidently. Remember, every horse is different—take time to learn your partner’s quirks, and don’t hesitate to seek guidance from experienced handlers. With practice and care, horse and driver can form a harmonious working team, keeping centuries-old traditions alive in the modern world.


Comments